

Recommended
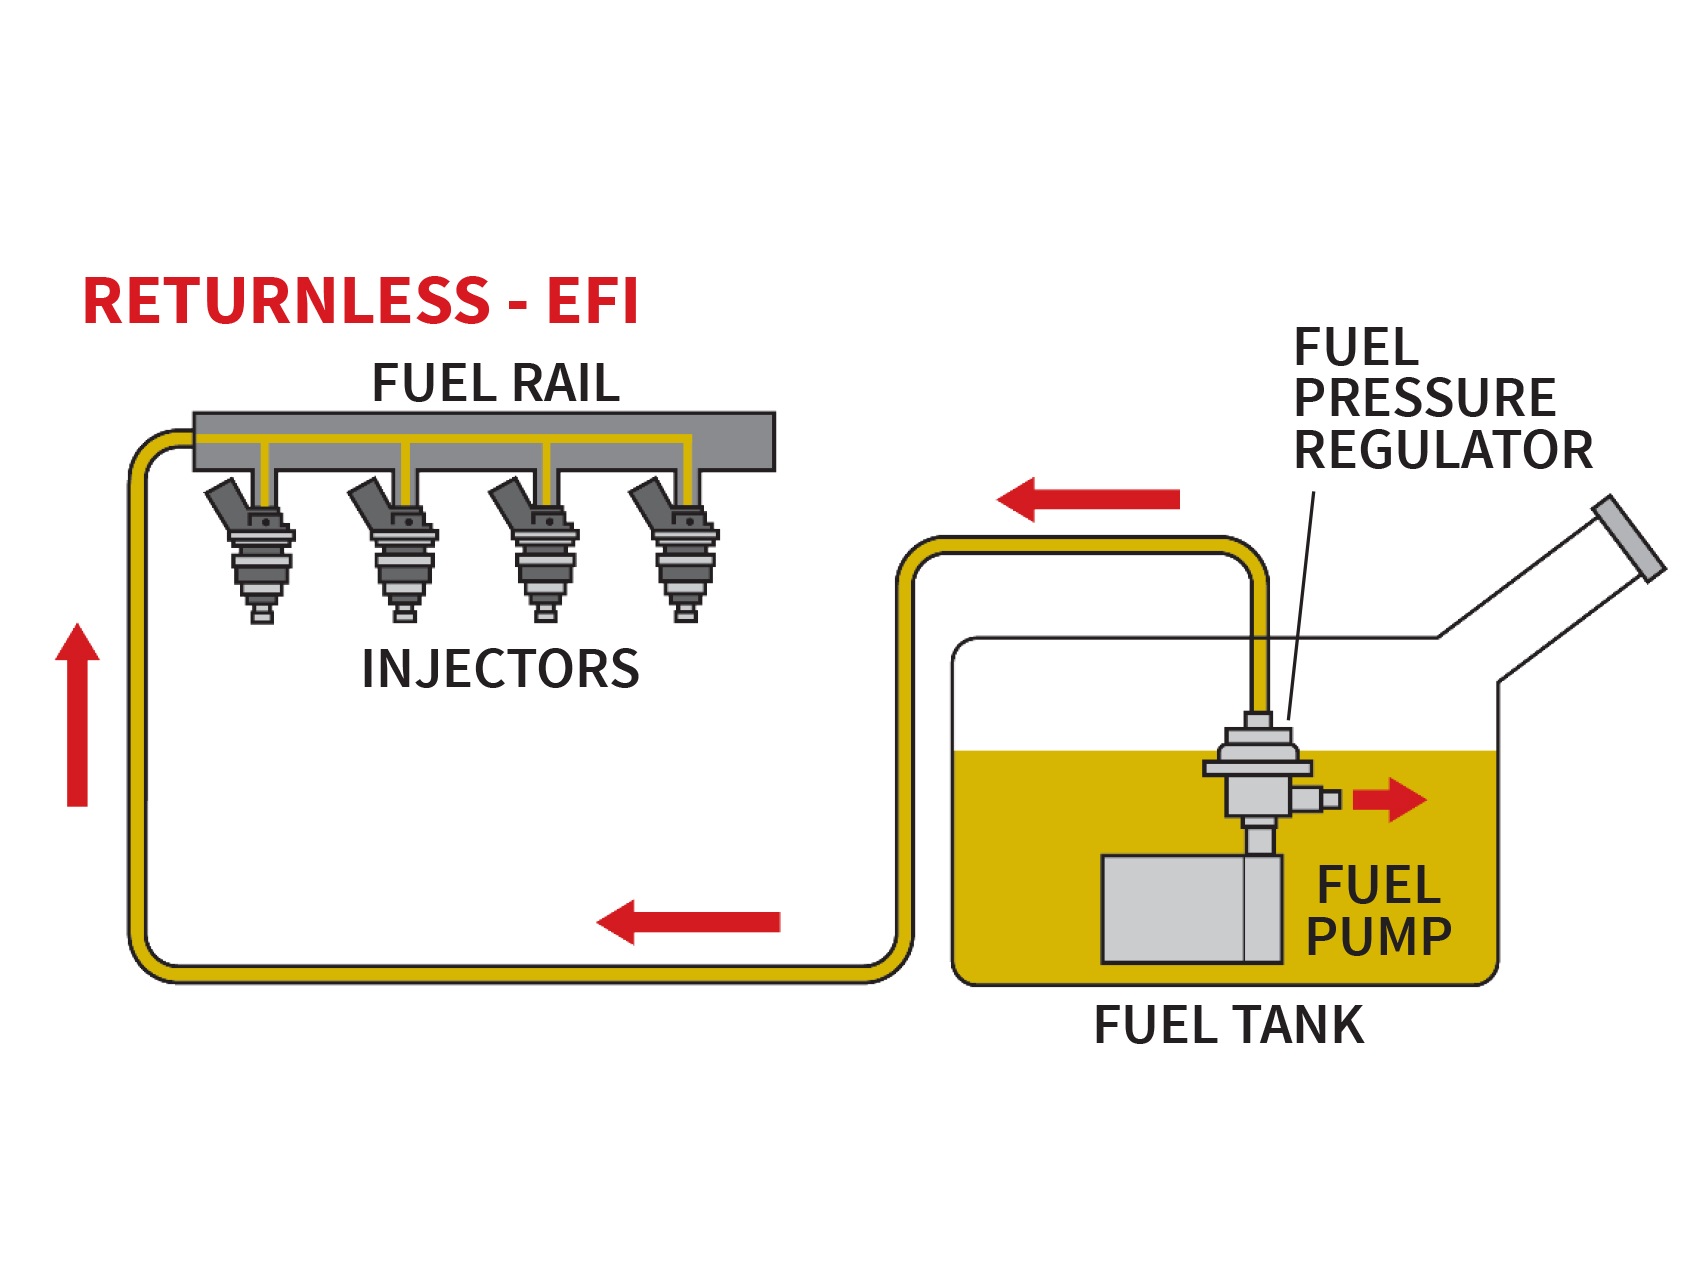
Fuel System
1
-

Last items
Brand:
TurboWorks
75 €
Net price: 59 €
Net price: 59 €

Available to order
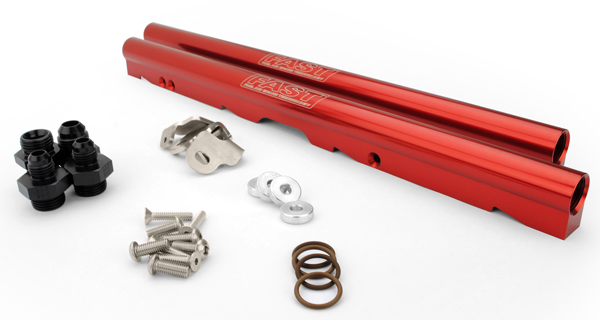
Brand:
DEATSCHWERKS
972 €
Net price: 765 €
Net price: 765 €

Available to order
Brand:
TURBOWORKS
81 €
Net price: 64 €
Net price: 64 €

Available to order
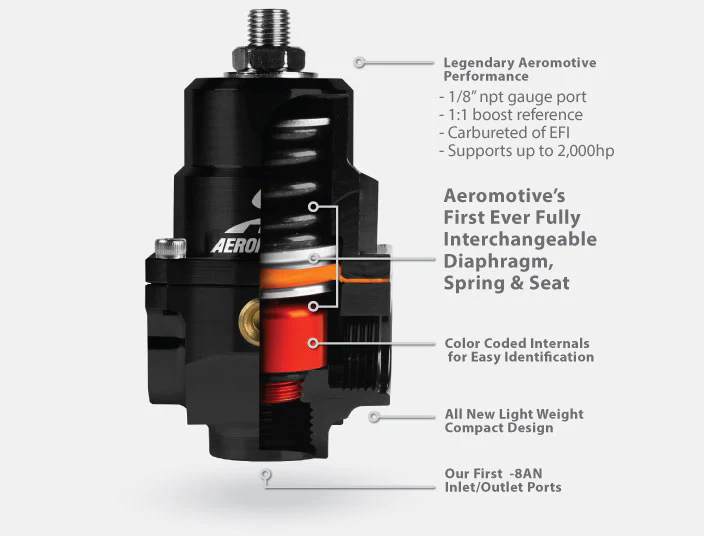
Brand:
AEROMOTIVE
695 €
Net price: 547 €
Net price: 547 €

Available to order
Brand:
AEROMOTIVE
448 €
Net price: 352 €
Net price: 352 €

Last items
Brand:
Walbro
109 €
Net price: 86 €
Net price: 86 €

Available to order
Brand:
AEROMOTIVE
1 470 €
Net price: 1 157 €
Net price: 1 157 €

Last items
Brand:
Walbro
187 €
Net price: 147 €
Net price: 147 €

Available to order
Brand:
AEROMOTIVE
598 €
Net price: 471 €
Net price: 471 €


Available to order
Brand:
DEATSCHWERKS
1 249 €
Net price: 984 €
Net price: 984 €

In stock
Brand:
Bosch
483 €
Net price: 380 €
Net price: 380 €

Available to order
Brand:
Walbro
23 €
Net price: 18 €
Net price: 18 €

Available to order
Brand:
TurboWorks
55 €
Net price: 44 €
Net price: 44 €

Available to order
Brand:
AEROMOTIVE
1 446 €
Net price: 1 139 €
Net price: 1 139 €