
A Mitsubishi silicone hose kit (vehicle-specific hose kit) is a model-matched set shaped around OEM routing and connection points, helping you build a clean layout for coolant and charge/air lines.
Choose by exact model, engine code and year, then confirm the fitment notes on the product card, including clamp access and clearance around brackets and sensors.
Use filters to narrow options, then verify what’s included and where it fits; clean surfaces and secure clamping support stable joints. Verify exact dimensions and specifications on the product card; in-stock items dispatch fast within the EU.
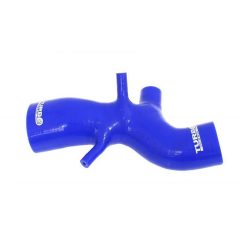
Net price: 57 €
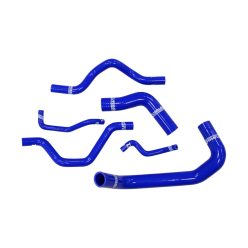
Net price: 100 €

Net price: 117 €

Net price: 117 €

Net price: 117 €
Net price: 162 €
Net price: 59 €
Net price: 165 €
Net price: 165 €
Net price: 117 €
Net price: 117 €
Net price: 117 €
Mitsubishi Silicone Hose Kits – Vehicle-Matched Sets for Predictable Fit
These Mitsubishi-focused vehicle-matched sets follow factory-style geometry and are a practical option when you want the convenience of a kit with less cutting and improvised routing than universal hose.
With the right selection, hoses can accommodate vibration and heat cycling, while sealing still depends on correct fitment, surface prep and clamp placement.
Technical background: why model-specific geometry helps
OEM-style routing can reduce side-load on joints as the system expands and contracts, helping manage thermal movement without forcing hard parts to carry the full load.
Clearance matters in tight bays; avoiding rub points supports component protection around mounts, shields and wiring where hoses pass close to brackets.
During install, aim for a kink-free route so the hose isn’t pinched, which can affect flow behaviour and joint stability over time.
- Circuit: Confirm whether the kit targets coolant, charge/air, or auxiliary connections in the product card notes.
- Geometry: Kits may combine elbows, straights and transitions to match factory packaging.
- Joints: Beaded spigots and suitable clamps can improve retention when positioned correctly.
How to choose the right Mitsubishi kit
Quick selection guide: Filter by Mitsubishi model, verify year range and engine code, then use the product card to confirm the target circuit and included pieces, plus any notes about installation order.
The product card is the final checkpoint; if you want to compare other brands in the same family, the main category provides a clear overview with filters.
- Engine code: Similar model names can hide different hose layouts and connection points.
- Year range: Revisions and facelifts may change lengths or spigot geometry.
- Service access: Make sure clamps remain reachable for inspection and re-checks.
Installation and failure prevention
Dry fit: Test seating depth first, check for natural hose orientation, and deburr sharp spigot edges to reduce the chance of nicking the inner surface during clamping.
Surface prep: degrease using a manufacturer-recommended cleaner, then allow to dry completely before applying load/boost, and avoid petroleum-based sprays or aggressive solvents (such as brake cleaner) as they can reduce friction and alter sealing behaviour.
Common failure: If the hose isn’t fully seated or the clamp lands outside the proper sealing zone, joints can start to weep or loosen over time; prevent this by seating to a firm stop, placing the clamp correctly on the spigot, and re-checking after heat cycling.
PRO TIP: Take reference photos before removal—matching the original orientation makes it faster to verify hose direction and clamp access during reassembly.
FAQ
How is a Mitsubishi silicone hose kit different from universal hose?
It is typically shaped to suit OEM-style routing and connection points for specific Mitsubishi models/engines, which can reduce cutting and improvised bends. Always confirm exact coverage on the product card.
How do I make sure the kit matches my engine variant?
Check model/year and engine code compatibility on the product card, then compare to your vehicle’s connection points. If multiple variants exist, the listing notes usually highlight the differences.
Coolant vs charge/air kits: what should I review before buying?
Confirm which circuit the kit targets and what parts are included. Also consider clamp access, nearby brackets/sensors and available clearance in the engine bay.
If I notice weeping at a joint, what inspection steps should I follow?
Start by confirming full seating and clamp position on the sealing area, then inspect the spigot edge for burrs or damage. Check the route for kinks or forced angles, and re-check after the first heat cycle.
When should I choose a kit instead of custom routing?
A kit is a good option when you want OEM-style geometry and a predictable, repeatable fit. Custom routing can make sense when hard parts, layout or connections have been modified beyond the standard path.
