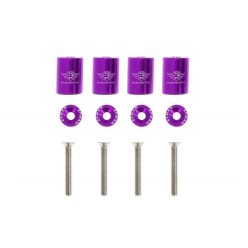
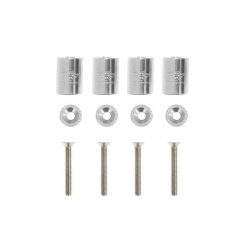
Our Hood Vent Spacers category includes universal and vehicle-specific kits that improve under-bonnet heat extraction and reduce pressure build-up. Most kits use anodised aluminium spacers with stainless hardware in 6–40 mm heights. Popular brands are SLIDE and MTUNING; common fitments include Honda Civic 88–00 and BMW E30/E36/E46/E9X. Always verify bolt thread and length to maintain sealing and bonnet alignment.
Brief summary + key benefits
Hood vent spacers raise the rear edge of the bonnet to help hot air escape from the engine bay. This can improve heat rejection, stabilise coolant temps on track days, and reduce heat soak to nearby components. Installation is typically reversible and requires minimal tools. Our range covers 6–40 mm heights in multiple anodised colours, with both vehicle-specific (e.g., BMW E-series, Honda Civic 88–00) and universal kits.
Technical Basics
Kits usually comprise anodised aluminium spacers and stainless bolts. Common threads are M6 or M8, but always check your hinges and latch brackets. Aerodynamically, the low-pressure region near the cowl helps extract hot air as the car moves; a modest gap achieves the effect without excessive turbulence. Oversized gaps may cause water ingress and bonnet flutter. Typical pitfalls include incorrect bolt length, missing washers, and chipped paint at the contact surfaces—use nylon or fibre washers where appropriate.
Because some water can enter during rain or washing, shield sensitive items (intake filter, fuse box). Re-torque after the first 100–200 km, since heat cycles and vibration can settle the joint. Verify rubber stops are adjusted so the latch closes smoothly without preload.
Selection Criteria
Choose the height first: 6–20 mm is common for road use; 20–40 mm suits track applications. For model-specific kits (BMW E30/E36/E46/E9X, Honda Civic 88–00), dimensions and bolt lengths are tailored for factory mounting points—making installation faster and alignment more consistent. With universal kits, measure hinge stack height and available thread engagement; aim for 1–1.5× bolt diameter as minimum engagement. The anodised finish provides colour options and wear resistance; prefer marine-grade stainless hardware if you expect winter salt exposure.
Appearance matters too: black and silver are discreet, while red, gold, purple and blue can match other bay accents. Always space both sides equally to preserve bonnet geometry. If your air filter sits near the rear edge, large gaps can invite dust—choose a smaller lift or fit a splash/particle shield.
Installation & Maintenance
Open the bonnet, support it safely, and remove the hinge bolts one side at a time. Insert the spacers, then install bolts with torque values around 8–10 Nm for M6 and 18–22 Nm for M8 (use the manufacturer’s spec where provided). Add flat and spring washers, align the bonnet, and adjust rubber stops to avoid rattle. Test with a light water spray; if you see ingress at the scuttle, reduce the gap or add EPDM strips along the edge.
For upkeep, check torque monthly and after any track event. Clean anodised parts with pH-neutral products; avoid abrasive pads. Inspect hinge areas for microcracks or paint wear and touch up as needed.
FAQ
Will this void my warranty?
It’s a reversible modification; check your vehicle and local regulations.
Do spacers make the cabin noisier?
A small increase in wind noise is possible with larger gaps; 6–20 mm is usually unobtrusive.
Is water ingress a problem?
Some splash can enter in heavy rain; protect sensitive components or use smaller lift.
What height should I choose?
6–20 mm for street, 20–40 mm for track-focused cooling.
Can I use universal kits?
Yes, if thread, bolt length and seating match your hinges and latch brackets.
Do I need to re-torque?
Yes—after 100–200 km, then periodically.


