
An electric exhaust cutout valve (electric cutout) is a switchable section installed into the exhaust system to change the gas flow path by button or remote control. In this range you will mostly find 2" / 51 mm sizes and several control formats.
Choosing the right version depends on pipe size, installation space, control method and kit contents; in many builds the choice comes down to 2.25" / 57 mm size, V-band, remote, switch-operated or PRO kit versions. Before fitting, use the product card to confirm motor clearance and connection style, because a tight installation can later cause restricted movement.
Use filters by size and version, then open the selected product to verify the exact contents of the kit. Verify exact dimensions and specifications on the product card; in-stock items dispatch fast within the EU.
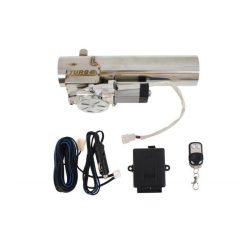

Net price: 61 €

Net price: 71 €
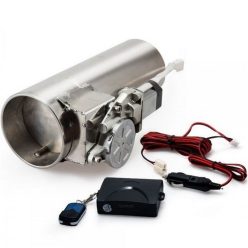
Net price: 65 €

Net price: 70 €

Net price: 76 €
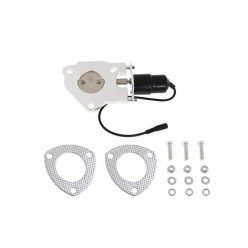
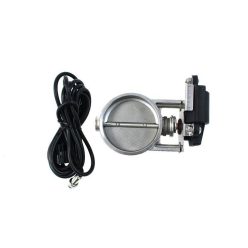
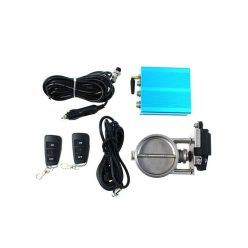
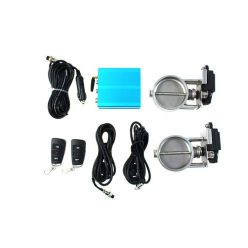
Net price: 218 €
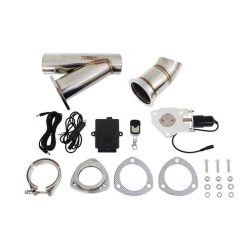
Net price: 100 €
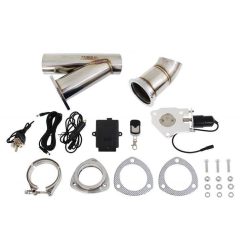
Net price: 100 €
Electric exhaust cutout valves: variable exhaust path and controlled operation
This category covers the electrically operated exhaust bypass format known by builders as a cutout valve: depending on the layout, it can redirect exhaust gas towards a different route, so the correct choice depends on space, connection style, control format and overall system design rather than diameter alone.
Technical background and system integration
Flow path: A cutout valve is usually installed into a branch section, so pipe direction, body length and surrounding clearances all affect how naturally the assembly sits in the system.
V-band or flange: Some versions use V-band connections while others suit more traditional flange-style layouts, so the joining method should match the exhaust you already have or plan to fabricate.
Electric actuator: Motorised operation is convenient, but only when there is enough room around the valve body, actuator housing and wiring connection for free movement and service access.
Thermal movement: Exhaust systems expand and shift in use, so the valve should be positioned where heat-related movement is less likely to side-load the body or disturb sealing contact.
- Size: On 2" / 51 mm and 2.25" / 57 mm systems, always confirm the real pipe size and joining logic, not only the nominal label.
- Control: Basic switch-operated, remote and full-kit versions differ in usability and wiring requirements, so the control method matters as much as the valve itself.
- Clearance: Crossmembers, heat shields and silencers often define the viable location more than the quoted valve diameter.
- Layout: Some kits suit a single-side arrangement while others are closer to a dual-system layout, so review the full exhaust plan before ordering.
How to choose the right one
Size matching: Start by deciding whether your build is closer to 2" / 51 mm or 2.25" / 57 mm, then confirm whether the installation needs V-band, weld-in or another joining approach.
Kit contents: A basic valve, a remote version, a switch-operated option and a PRO kit do not include the same parts, so check carefully what is actually supplied for operation and mounting.
Quick filtering: On this page it makes sense to narrow the range by size, control method and kit type first, then use the product card to confirm whether the item is a standalone valve, a V-band version or a more complete package.
Installation and failure-prevention tips
Clean alignment: Before final assembly, inspect pipe end straightness, mating surfaces and full blade travel. In this mechanical category, clean threads, an even tightening sequence and stress-free support matter more than any universal torque figure.
Common issue: If the valve body is installed with slight twist, or the actuator sits too close to strong heat, operation may slow down, the blade may not seat evenly and soot marks can appear around the joint area. This can often be reduced by test-fitting, proper support and a planned wiring route before final tightening.
Wiring protection: Do not leave the loom or receiver hanging close to the exhaust; use a heat-managed route and keep enough slack for drivetrain and exhaust movement without pulling the connectors.
PRO TIP: Before committing to the final position, mock up the valve body and actuator space with a template or spare tube section; this often saves unnecessary cutting and rework later.
Frequently asked questions
What is the difference between V-band and a more traditional flange-style version?
V-band can offer a more compact and quicker-to-service connection, which may be helpful in tighter spaces or on builds that are disassembled more often. The better option depends on the existing pipework, available room and fabrication plan.
Is the nominal size enough to choose the right product?
No. Alongside the nominal 2" or 2.25" size, you should also confirm connection format, body clearance and kit contents, because these details strongly affect fitment and installation time.
What is the most common failure or installation mistake?
Work through a simple check order: confirm pipe size and connection type first, then verify full blade movement, power supply and earth, and finally review the cable path and heat exposure. If the listed kit contents and the real installation environment do not match, the mismatch usually appears during test-fit.
Should I choose a remote or a switch-operated version?
That depends mainly on how you want to control the valve in the car. A remote can be more convenient where you do not want to add a dedicated cabin switch, while a fixed switch setup may suit a simpler control layout.
How can I check fitment before the first start-up?
Inspect full blade travel, mating surface contact, cable distance from hot parts and whether the system remains stress-free once supported. That sequence quickly shows whether further adjustment is needed on geometry, wiring or heat management.
